> ## Documentation Index
> Fetch the complete documentation index at: https://docs.meetdarwin.ai/llms.txt
> Use this file to discover all available pages before exploring further.

# Step 4: Add the chat to your website

> Setting up on your own: allow your domain, then add Darwin's site tag to any website, or install it on Webflow, WordPress, Framer or Google Tag Manager, and check the installation. One flow for each.

<div className="darwin-location"><strong>Find it in Darwin</strong> Integrations → Your website <a href="https://app.meetdarwin.ai/admin/settings/integrations">Open this screen ↗</a></div>

Darwin's chat runs on your website from one script tag, added once for every page. Pick how your website is built and follow that flow. When Darwin finds the tag on your site, Home ticks off **Connect your website**.
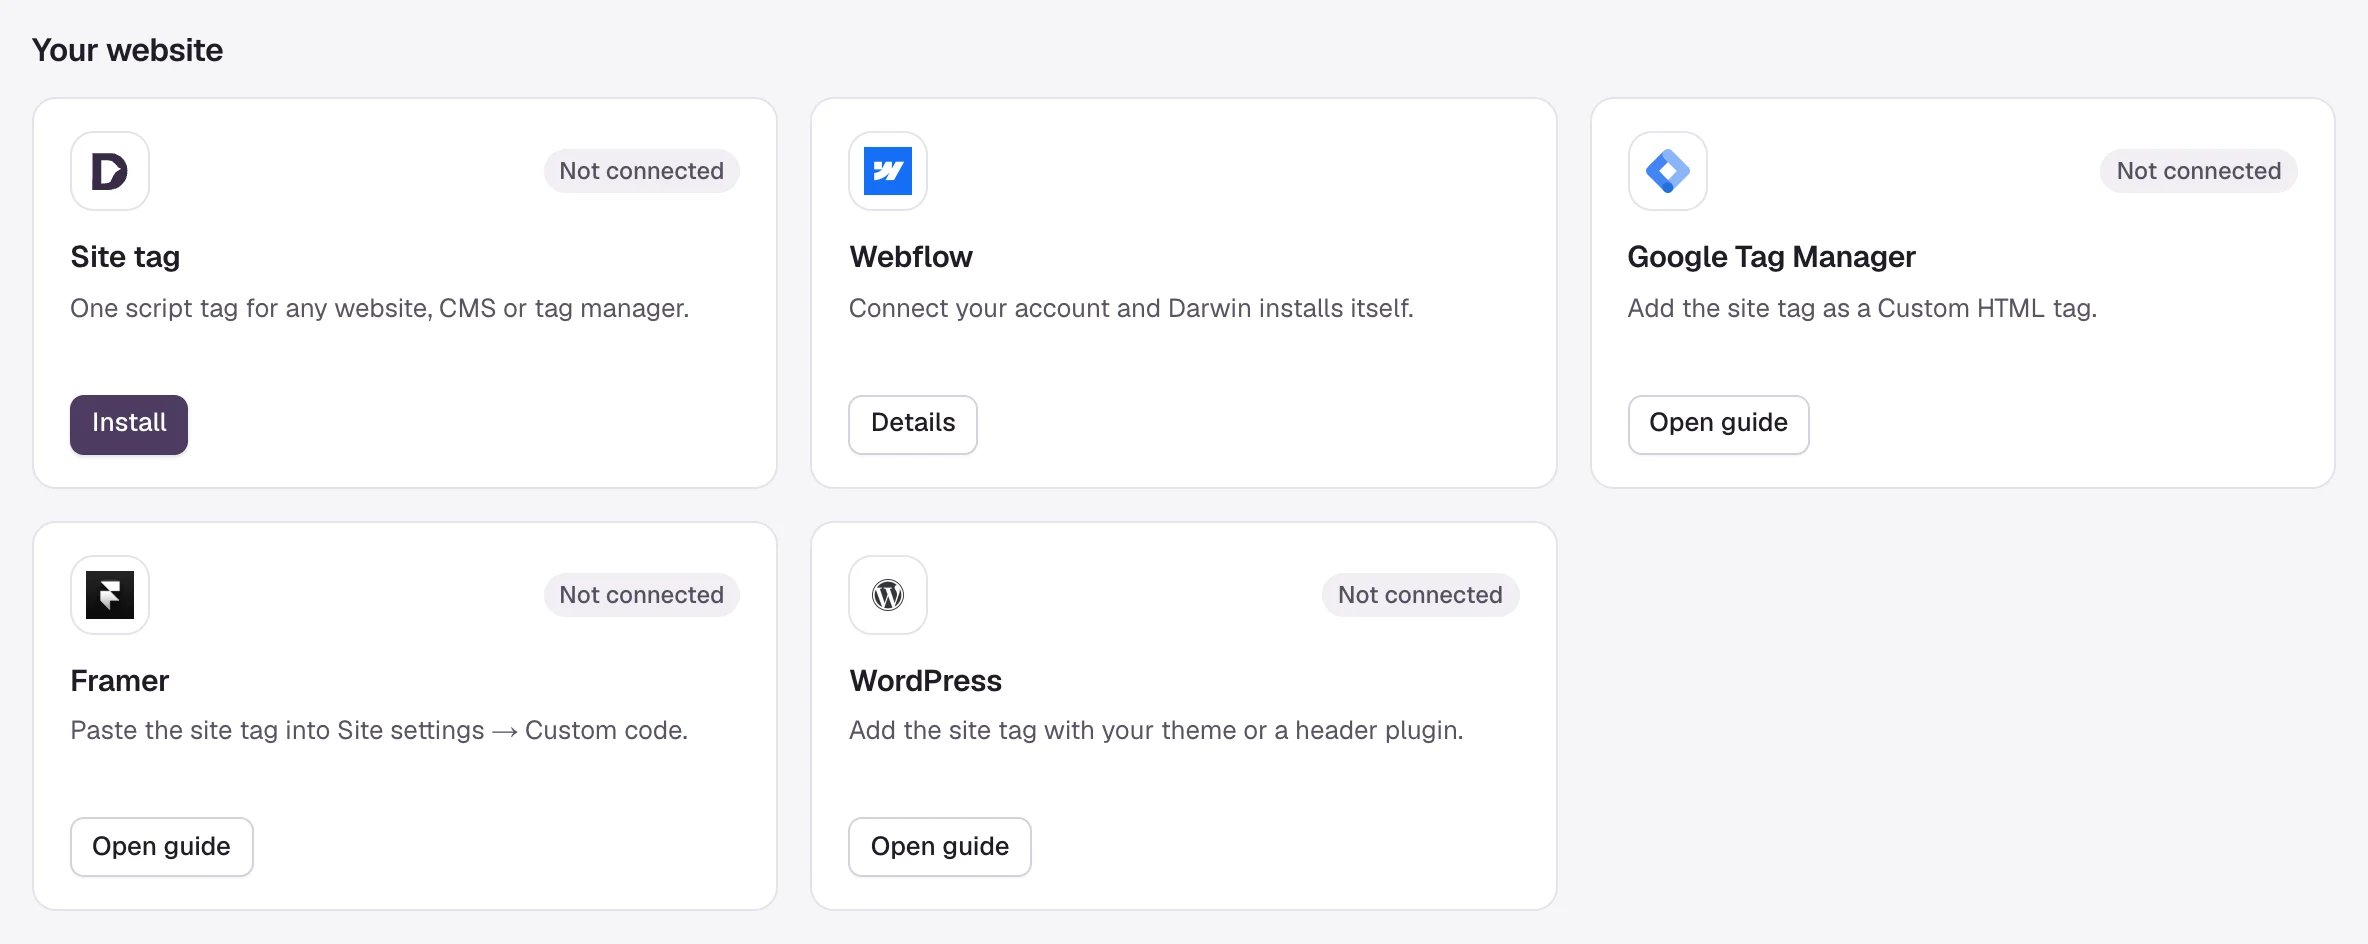
<Frame caption="Integrations → Your website: one card per way to install.">
  <img style={{ width: 1184, maxWidth: "100%" }} src="https://mintcdn.com/meet-darwin/cfyypApC_g6Sd8eh/images/guides/start/install-platforms.webp?fit=max&auto=format&n=cfyypApC_g6Sd8eh&q=85&s=c2ff27d846e3c5f392cf7addd029a4b2" alt="The Your website section of Integrations: Site tag, Webflow, Google Tag Manager, Framer and WordPress cards." width="2368" height="944" data-path="images/guides/start/install-platforms.webp" />
</Frame>

## First, allow your domain

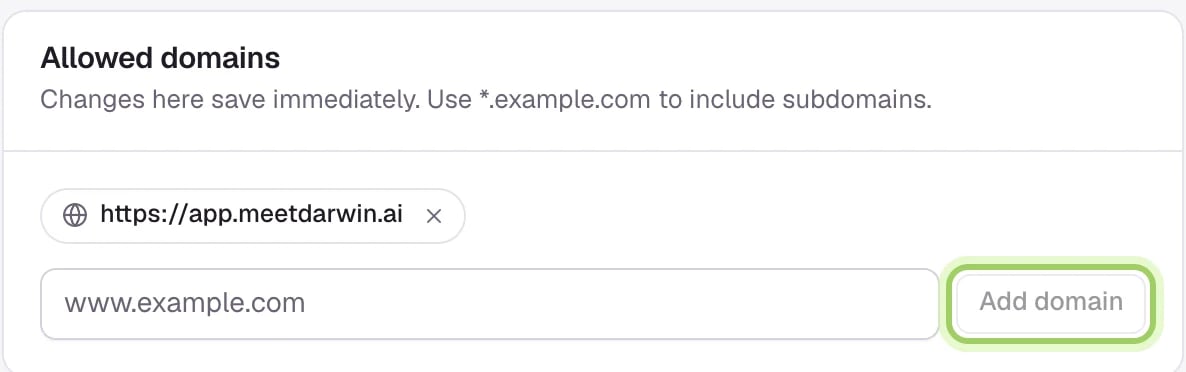
Open **Agent Studio → Visibility & privacy**. Under **Allowed domains**, type your website's address and select **Add domain**. The chat only runs on domains in this list, and `www.example.com` and `example.com` count as different. Webflow adds its domains for you, so skip this if you use Webflow.
<Frame>
  <img style={{ width: 593, maxWidth: "100%" }} src="https://mintcdn.com/meet-darwin/cfyypApC_g6Sd8eh/images/guides/start/install-domains.webp?fit=max&auto=format&n=cfyypApC_g6Sd8eh&q=85&s=c42aca0cf4e96f7a5ad6996a3805c5c9" alt="Allowed domains with the www.example.com field and the Add domain button highlighted." width="1186" height="372" data-path="images/guides/start/install-domains.webp" />
</Frame>

## Then pick your website

<Tabs>
  <Tab title="Any website">
    For a site you edit yourself, or any builder with a site-wide custom code setting.

    <Steps>
      <Step title="Copy the site tag">
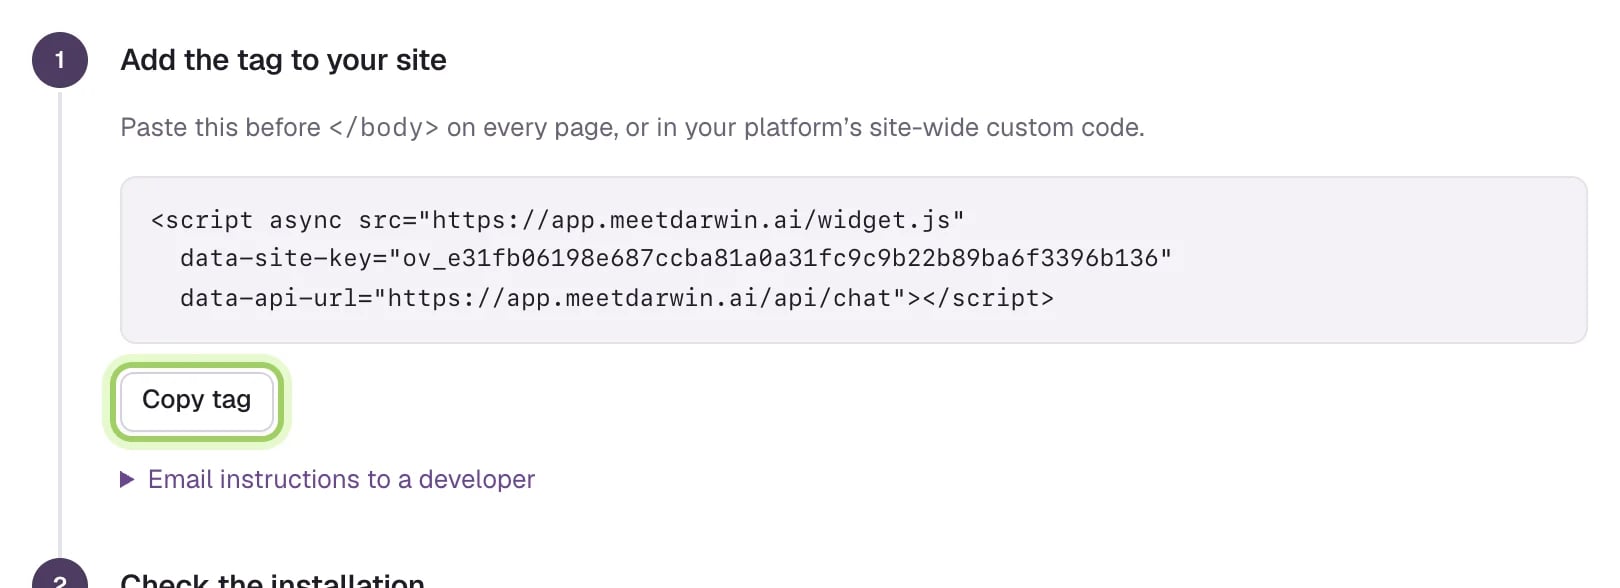
        In **Integrations**, select the **Site tag** card, then **Copy tag**.
        <Frame>
          <img style={{ width: 810, maxWidth: "100%" }} src="https://mintcdn.com/meet-darwin/cfyypApC_g6Sd8eh/images/guides/start/install-copy.webp?fit=max&auto=format&n=cfyypApC_g6Sd8eh&q=85&s=f952ed4bb1edc2853ad348dcca90b544" alt="Add the tag to your site: the script tag with your site key, and the Copy tag button highlighted." width="1620" height="588" data-path="images/guides/start/install-copy.webp" />
        </Frame>
      </Step>

      <Step title="Paste it on every page and publish">
        Paste the tag just before `</body>` on every page, or into your builder's site-wide custom code (often called code injection, or custom code for the footer or body). Add it once, then publish your site.

        Someone else edits your website? Open **Email instructions to a developer**, enter their email and select **Email instructions**.
      </Step>

      <Step title="Check the installation">
        Select **Check installation**. When Darwin finds the tag, the step shows **Verified**.

        <Frame>
          <img style={{ width: 810, maxWidth: "100%" }} src="https://mintcdn.com/meet-darwin/cfyypApC_g6Sd8eh/images/guides/start/install-check.webp?fit=max&auto=format&n=cfyypApC_g6Sd8eh&q=85&s=ea061eb846860ab6c6144ba8b3e45734" alt="Check the installation, with the Check installation button highlighted and the Page to check first field." width="1620" height="582" data-path="images/guides/start/install-check.webp" />
        </Frame>
      </Step>
    </Steps>

    Full guide: [Install Darwin on any website](/installation/install-widget).
  </Tab>

  <Tab title="Webflow">
    Connect the Darwin app and it adds the tag to your Webflow site for you.

    <Steps>
      <Step title="Connect Webflow">
        In **Integrations**, select **Connect** on the **Webflow** card, then **Connect Webflow**. Choose the sites Darwin can access and approve the permissions.

        <Frame>
          <img style={{ width: 794, maxWidth: "100%" }} src="https://mintcdn.com/meet-darwin/Th-W8aKaOyiQClss/images/guides/integrations/webflow-connect.webp?fit=max&auto=format&n=Th-W8aKaOyiQClss&q=85&s=96cd6baf1d7711a09a34f523a6da5986" alt="Step 1, Connect Webflow, with the Connect Webflow button highlighted." width="1588" height="334" data-path="images/guides/integrations/webflow-connect.webp" />
        </Frame>
      </Step>

      <Step title="Add Darwin to a site">
        Choose the site and select **Add Darwin**. Darwin adds its script and your site's domains. Nothing is published yet.

        <Frame>
          <img style={{ width: 794, maxWidth: "100%" }} src="https://mintcdn.com/meet-darwin/Th-W8aKaOyiQClss/images/guides/integrations/webflow-site.webp?fit=max&auto=format&n=Th-W8aKaOyiQClss&q=85&s=b3f9d75ecc28b6babd449d61454c5299" alt="Step 2, Add Darwin to a site, with the Add Darwin button highlighted." width="1588" height="304" data-path="images/guides/integrations/webflow-site.webp" />
        </Frame>
      </Step>

      <Step title="Publish the site">
        Select **Publish site now**. This publishes the site with any other unpublished changes.

        <Frame>
          <img style={{ width: 794, maxWidth: "100%" }} src="https://mintcdn.com/meet-darwin/Th-W8aKaOyiQClss/images/guides/integrations/webflow-publish.webp?fit=max&auto=format&n=Th-W8aKaOyiQClss&q=85&s=2fc8aa101078ded0e9ae4f2903f897a1" alt="Step 3, Publish the site, with the Publish site now button highlighted." width="1588" height="292" data-path="images/guides/integrations/webflow-publish.webp" />
        </Frame>
      </Step>

      <Step title="Check the installation">
        Select **Check installation**. Darwin confirms when it finds its tag on the live site.
      </Step>
    </Steps>

    Full guide: [Install Darwin on Webflow](/integrations/webflow).
  </Tab>

  <Tab title="WordPress">
    Add the tag to your theme's footer, or with a header-and-footer plugin.

    <Steps>
      <Step title="Copy the tag">
        In **Integrations**, select **Open guide** on the **WordPress** card, then **Copy tag**.

        <Frame>
          <img style={{ width: 794, maxWidth: "100%" }} src="https://mintcdn.com/meet-darwin/Th-W8aKaOyiQClss/images/guides/integrations/wordpress-tag.webp?fit=max&auto=format&n=Th-W8aKaOyiQClss&q=85&s=2ccc55731850dd65a1fd977d5ce2f7fc" alt="Step 1, Add the tag to WordPress, with the site tag and the Copy tag button highlighted." width="1588" height="598" data-path="images/guides/integrations/wordpress-tag.webp" />
        </Frame>
      </Step>

      <Step title="Paste it into your site-wide footer">
        Paste the whole tag into your theme's footer, or into the footer field of a plugin such as WPCode (**Code Snippets → Header & Footer**), and save. Not into one post or a Custom HTML block.
      </Step>

      <Step title="Clear the cache">
        If a caching plugin, your host or a CDN caches pages, clear it.
      </Step>

      <Step title="Check the installation">
        Back in Darwin, select **Check installation**.

        <Frame>
          <img style={{ width: 794, maxWidth: "100%" }} src="https://mintcdn.com/meet-darwin/Th-W8aKaOyiQClss/images/guides/integrations/wordpress-check.webp?fit=max&auto=format&n=Th-W8aKaOyiQClss&q=85&s=ffcac4203255fc5db0d7355ec8bb9141" alt="Step 2, Check the installation, with the Check installation button highlighted." width="1588" height="550" data-path="images/guides/integrations/wordpress-check.webp" />
        </Frame>
      </Step>
    </Steps>

    Full guide: [Install Darwin on WordPress](/integrations/wordpress).
  </Tab>

  <Tab title="Framer">
    Paste the tag into Framer's site-wide custom code.

    <Steps>
      <Step title="Copy the tag">
        In **Integrations**, select **Open guide** on the **Framer** card, then **Copy tag**.

        <Frame>
          <img style={{ width: 794, maxWidth: "100%" }} src="https://mintcdn.com/meet-darwin/Th-W8aKaOyiQClss/images/guides/integrations/framer-tag.webp?fit=max&auto=format&n=Th-W8aKaOyiQClss&q=85&s=c737271a60b47ca3f640cd2d25d550e1" alt="Step 1, Add the tag to Framer, with the site tag and the Copy tag button highlighted." width="1588" height="556" data-path="images/guides/integrations/framer-tag.webp" />
        </Frame>
      </Step>

      <Step title="Paste it into Framer's custom code">
        In Framer's site settings, open **Custom code** and paste the tag at the end of the body, on all pages. If Framer asks how often to run it, choose once.
      </Step>

      <Step title="Publish">
        Save and publish the site, then open the published site, not the editor.
      </Step>

      <Step title="Check the installation">
        Back in Darwin, select **Check installation**.

        <Frame>
          <img style={{ width: 794, maxWidth: "100%" }} src="https://mintcdn.com/meet-darwin/Th-W8aKaOyiQClss/images/guides/integrations/framer-check.webp?fit=max&auto=format&n=Th-W8aKaOyiQClss&q=85&s=a53b3bbf528a89ed930e0c855de1f9e9" alt="Step 2, Check the installation, with the Check installation button highlighted." width="1588" height="550" data-path="images/guides/integrations/framer-check.webp" />
        </Frame>
      </Step>
    </Steps>

    Full guide: [Install Darwin on Framer](/integrations/framer).
  </Tab>

  <Tab title="Google Tag Manager">
    Add the tag as a Custom HTML tag that fires on all pages.

    <Steps>
      <Step title="Copy the tag">
        In **Integrations**, select **Open guide** on the **Google Tag Manager** card, then **Copy tag**.

        <Frame>
          <img style={{ width: 794, maxWidth: "100%" }} src="https://mintcdn.com/meet-darwin/Th-W8aKaOyiQClss/images/guides/integrations/gtm-tag.webp?fit=max&auto=format&n=Th-W8aKaOyiQClss&q=85&s=7f8d8f437ed661c2c55a3af53ddfa77f" alt="Step 1, Add the tag to Google Tag Manager, with the site tag and the Copy tag button highlighted." width="1588" height="598" data-path="images/guides/integrations/gtm-tag.webp" />
        </Frame>
      </Step>

      <Step title="Add a Custom HTML tag">
        In your container, open **Tags → New**, name it **Darwin chat**, choose **Custom HTML** and paste the tag. Under **Triggering**, choose **All Pages**, then save.
      </Step>

      <Step title="Preview and publish">
        Select **Preview** to check that **Darwin chat** fires once, then **Submit** and **Publish**.
      </Step>

      <Step title="Check the installation">
        Back in Darwin, select **Check installation**.

        <Frame>
          <img style={{ width: 794, maxWidth: "100%" }} src="https://mintcdn.com/meet-darwin/Th-W8aKaOyiQClss/images/guides/integrations/gtm-check.webp?fit=max&auto=format&n=Th-W8aKaOyiQClss&q=85&s=35723e4a8b4523d0de520d86cc627a23" alt="Step 2, Check the installation, with the Check installation button highlighted." width="1588" height="550" data-path="images/guides/integrations/gtm-check.webp" />
        </Frame>
      </Step>
    </Steps>

    Full guide: [Install Darwin with Google Tag Manager](/integrations/google-tag-manager).
  </Tab>
</Tabs>

## Good to know

* Add the tag once. Two copies can show two chat buttons.
* The chat stays hidden on your website until you go live in step 5, so installing early is safe.
* Can't see the chat after going live? See [The chat isn't showing](/help/widget-not-showing).

<CardGroup cols={2}>
  <Card title="Step 5: Go live" icon="rocket" href="/getting-started/own-go-live">Switch your agent on.</Card>
  <Card title="Back to the overview" icon="list-checks" href="/getting-started/on-your-own">All five steps.</Card>
</CardGroup>


This documentation is built and hosted on [Mintlify](https://mintlify.com), a developer documentation platform.