> ## Documentation Index
> Fetch the complete documentation index at: https://docs.meetdarwin.ai/llms.txt
> Use this file to discover all available pages before exploring further.
# Step 1: Set up your agent
> Setting up on your own: in Agent Studio → Messages, name your agent, choose its voice, write the opening message above the chat button, then save. This completes the Assistant step on Home.
Your agent needs a name, a voice and an opening line before it can go live. All three are on one tab in Agent Studio, and saving them ticks off **Assistant** on Home.
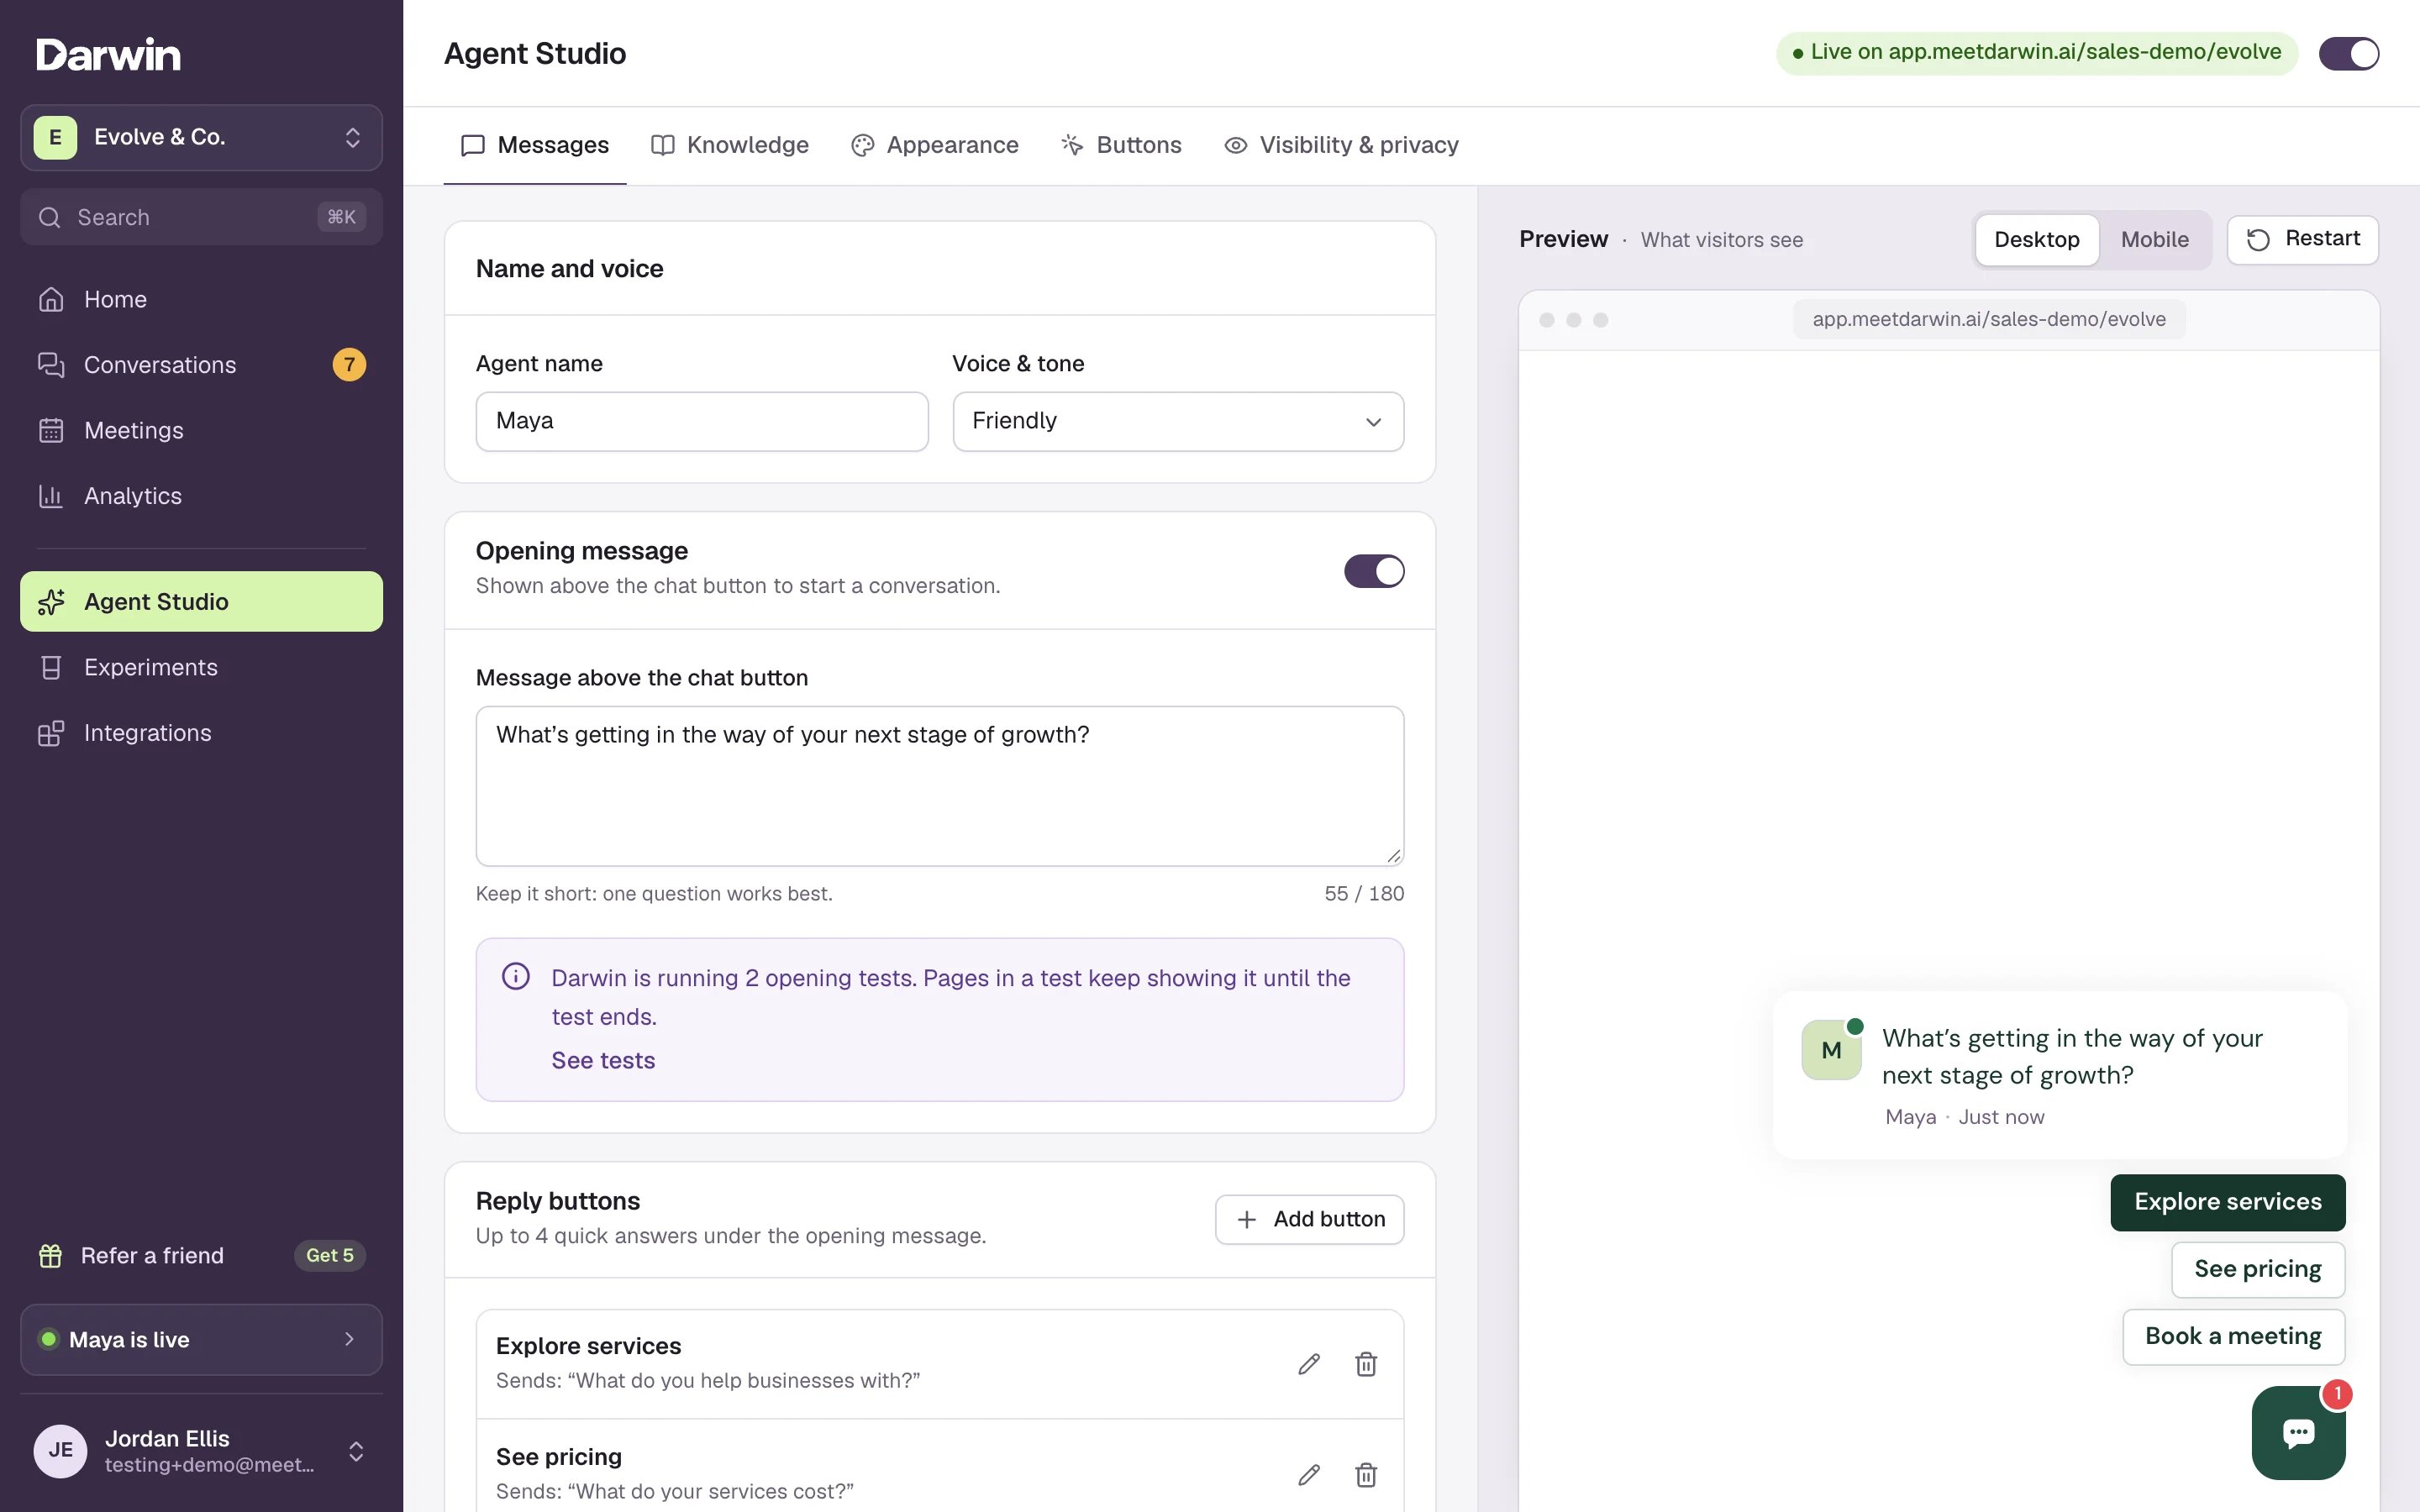 Select **Agent Studio** in the sidebar. It opens on the **Messages** tab.
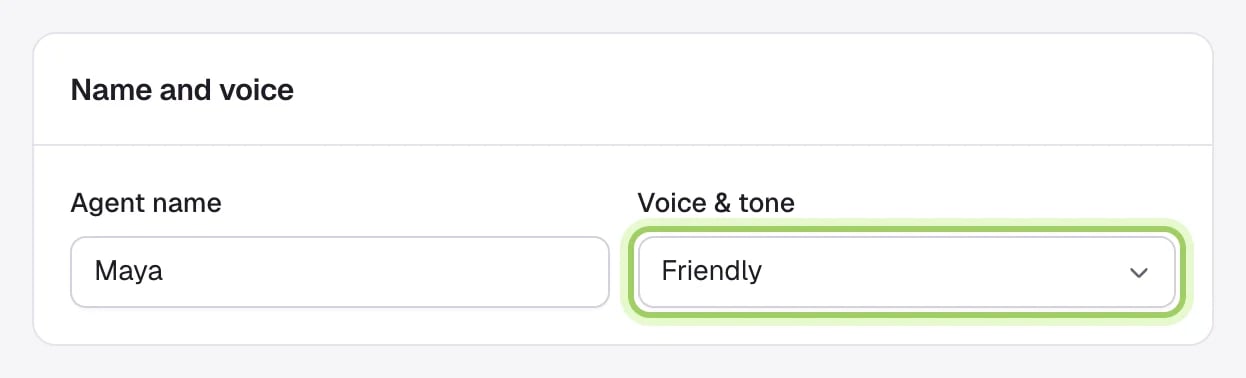
Under **Name and voice**, type the **Agent name** visitors see in the chat. Open **Voice & tone** and choose **Friendly**, **Professional** or **Direct**.
Select **Agent Studio** in the sidebar. It opens on the **Messages** tab.
Under **Name and voice**, type the **Agent name** visitors see in the chat. Open **Voice & tone** and choose **Friendly**, **Professional** or **Direct**.
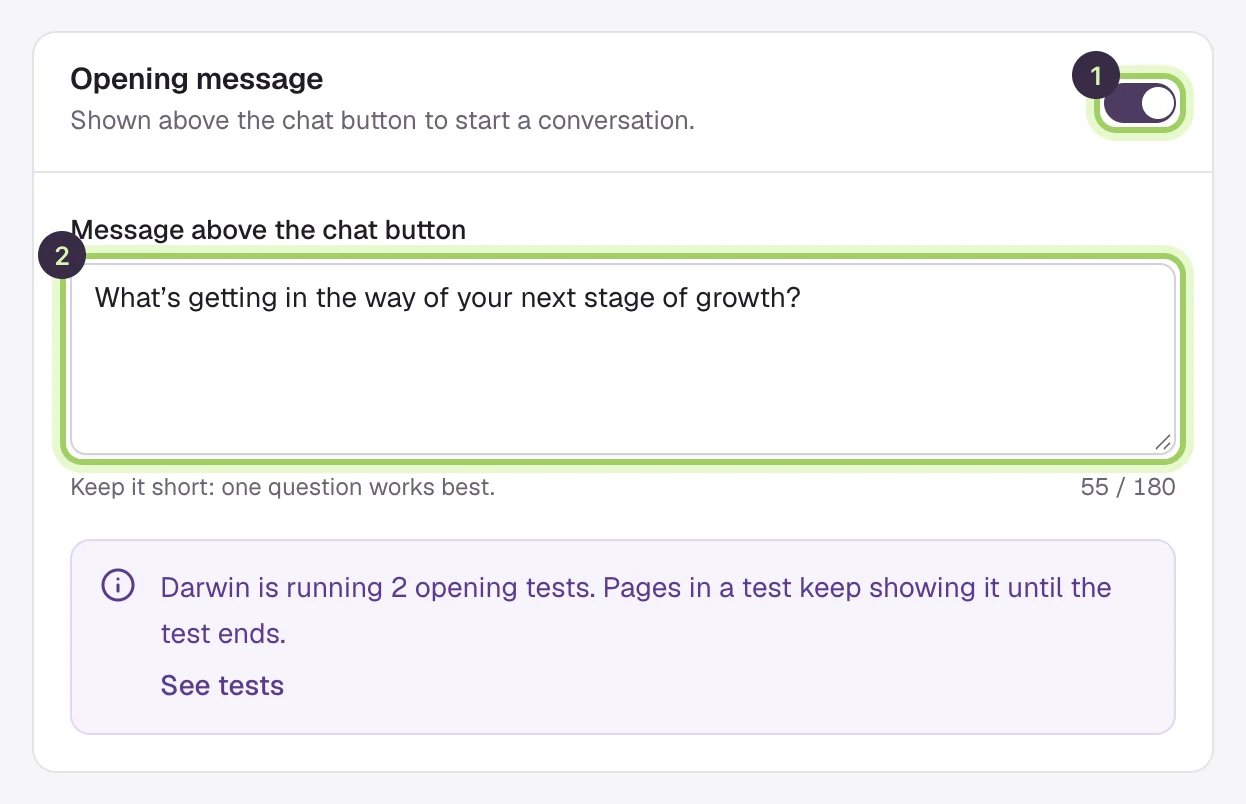
 The opening message is the short card above the chat button that invites visitors to talk. Make sure its switch (1) is on, then write it in **Message above the chat button** (2), up to 120 characters. One question works best, for example "Comparing plans? I can tell you which one fits your team."
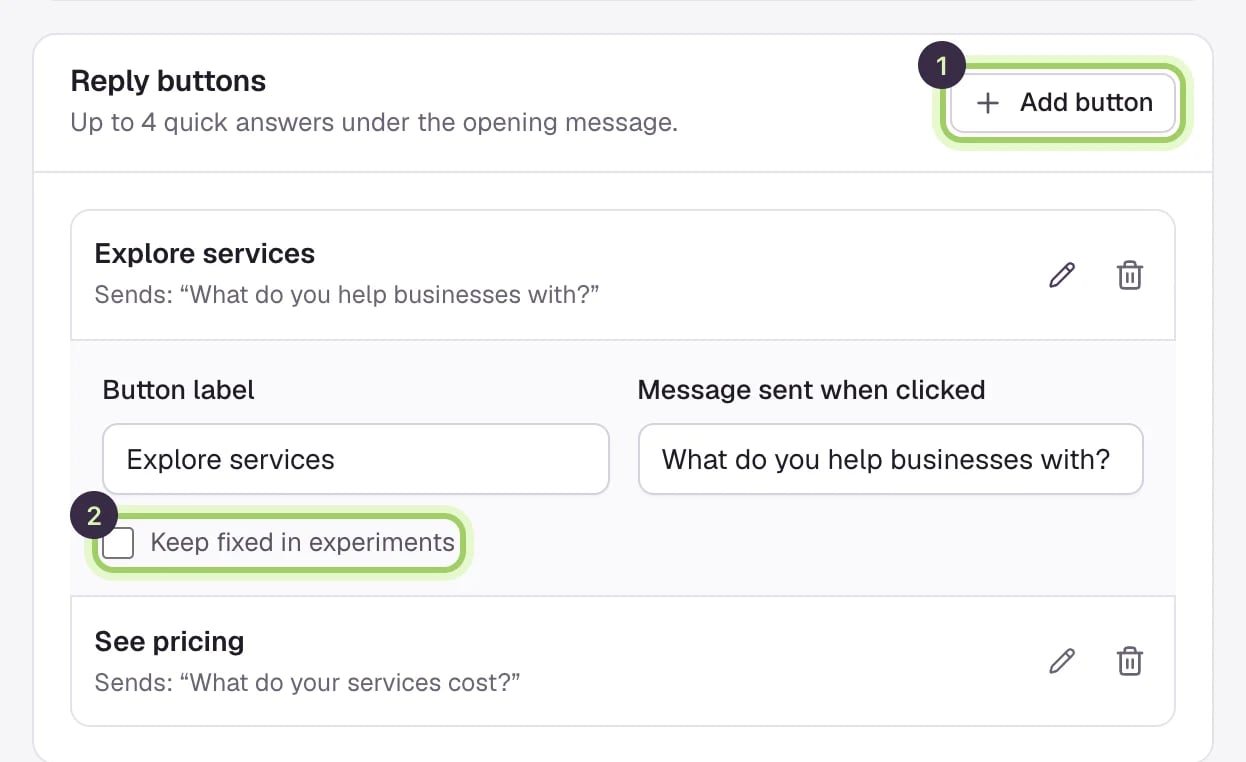
 Under **Reply buttons**, select **Add button** to give visitors one-click answers under the opening, such as **See pricing** or **Book a demo**. You can have up to 4.
 Select **Save changes** in the bar at the bottom. Home now shows **Assistant** as done.
 ## Good to know
* The preview on the right shows your unsaved changes, so you can see the opening before you save.
* Darwin reads your website when you sign up, so your agent already knows your pages. Check what it knows in **Knowledge** during [step 3](/getting-started/own-try).
* Everything on this tab is explained in [Messages: name, voice and opening](/assistant/identity-and-behavior).
So visitors can book a meeting in the chat.
All five steps.
This documentation is built and hosted on [Mintlify](https://mintlify.com), a developer documentation platform.
## Good to know
* The preview on the right shows your unsaved changes, so you can see the opening before you save.
* Darwin reads your website when you sign up, so your agent already knows your pages. Check what it knows in **Knowledge** during [step 3](/getting-started/own-try).
* Everything on this tab is explained in [Messages: name, voice and opening](/assistant/identity-and-behavior).
So visitors can book a meeting in the chat.
All five steps.
This documentation is built and hosted on [Mintlify](https://mintlify.com), a developer documentation platform.